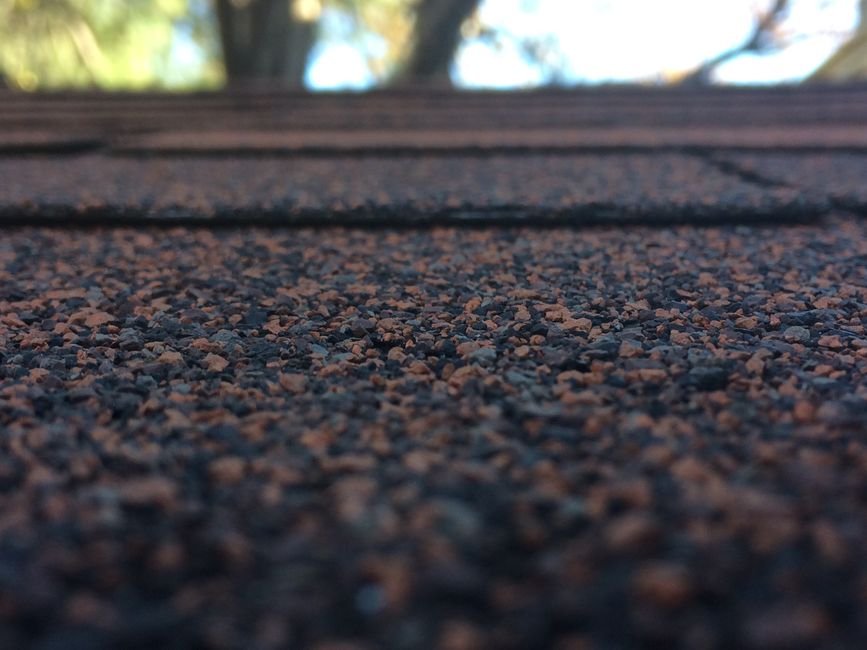

How to Identify Roof Leak Sources and Assess Damage
Before pulling out a ladder, identify exactly where water is getting in. Finding the source of a leak can be tricky because water rarely travels straight down. It frequently runs along rafters, underlayment, and roof deck boards before finally dropping through your ceiling. Partnering with experienced central Ohio asphalt roof repair contractors helps locate hidden leaks before water damages your home’s structural framing.
Step-by-Step Leak Tracing in Attics and Flashings
The best place to start your search is inside the attic on a bright day. Turn off all attic lights and scan for daylight shining through the roof deck. Next, grab a flashlight and inspect the underside of the decking and rafters for dark water stains, mold growth, or damp insulation.
Remember this fundamental rule of roof leak tracing: the actual roof penetration is almost always 2 to 6 feet uphill from where the interior water stain appears. Water enters a crack, flows down the sloping rafter, and drops off at a low point or joint in the drywall.
If you don’t see obvious water paths inside, move your inspection outside. Flashing issues cause approximately 90% of all roof leaks. Pay special attention to:
- Chimney flashings and step flashings along sidewalls
- Vent pipe boots (rubber collars often crack under UV exposure)
- Roof valleys where two slopes meet
- Skylight perimeters and wall intersections
If you suspect damage but can’t pinpoint the entry point, scheduling comprehensive roof inspections is the safest way to evaluate your entire roofing system without taking unnecessary risks.
Essential Safety Equipment for Roof Work
Roofing is inherently hazardous. Falling from a roof can result in severe injury, so safety precautions are non-negotiable.
- Roofing Harness and Ridge Hook: Always wear an OSHA-compliant safety harness anchored securely to a ridge hook on roof pitches steeper than 4:12.
- Footwear: Wear clean, soft-rubber, slip-resistant boots that grip granules without damaging the shingles.
- Ladder Safety: Extend your ladder at least 3 feet above the eave line, tie off the top, and follow the 4-to-1 ratio (place the ladder base 1 foot away from the wall for every 4 feet of ladder height).
- Weather Conditions: Never work on a wet, icy, or excessively windy roof. Wait until frost and morning dew have completely evaporated.
Step-by-Step Guide for DIY Asphalt Roof Repairs
Asphalt shingles are modular, meaning you can unseal and replace single shingles without tearing apart large sections of your roof.
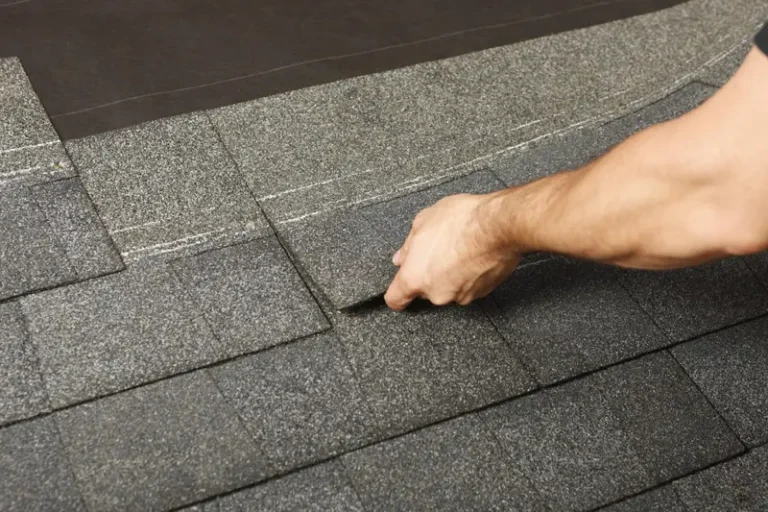
Before starting, gather these standard tools:
- Flat pry bar (wonder bar)
- Utility knife with hook blades
- Galvanized 1.25-inch roofing nails
- Hammer or pneumatic roofing nailer
- Fibered plastic roofing cement
- Caulking gun with high-grade sealant
- Heat gun (if working in cooler weather)
If you’re tackling minor maintenance yourself, check out our guide on The Homeowners Handbook For Easy Asphalt Shingle Repair for additional practical tips.
Replacing Missing or Blown-Off Shingles
Severe windstorms can catch the edges of unsealed shingles and strip them right off the roof. Here is how to install a new shingle properly:
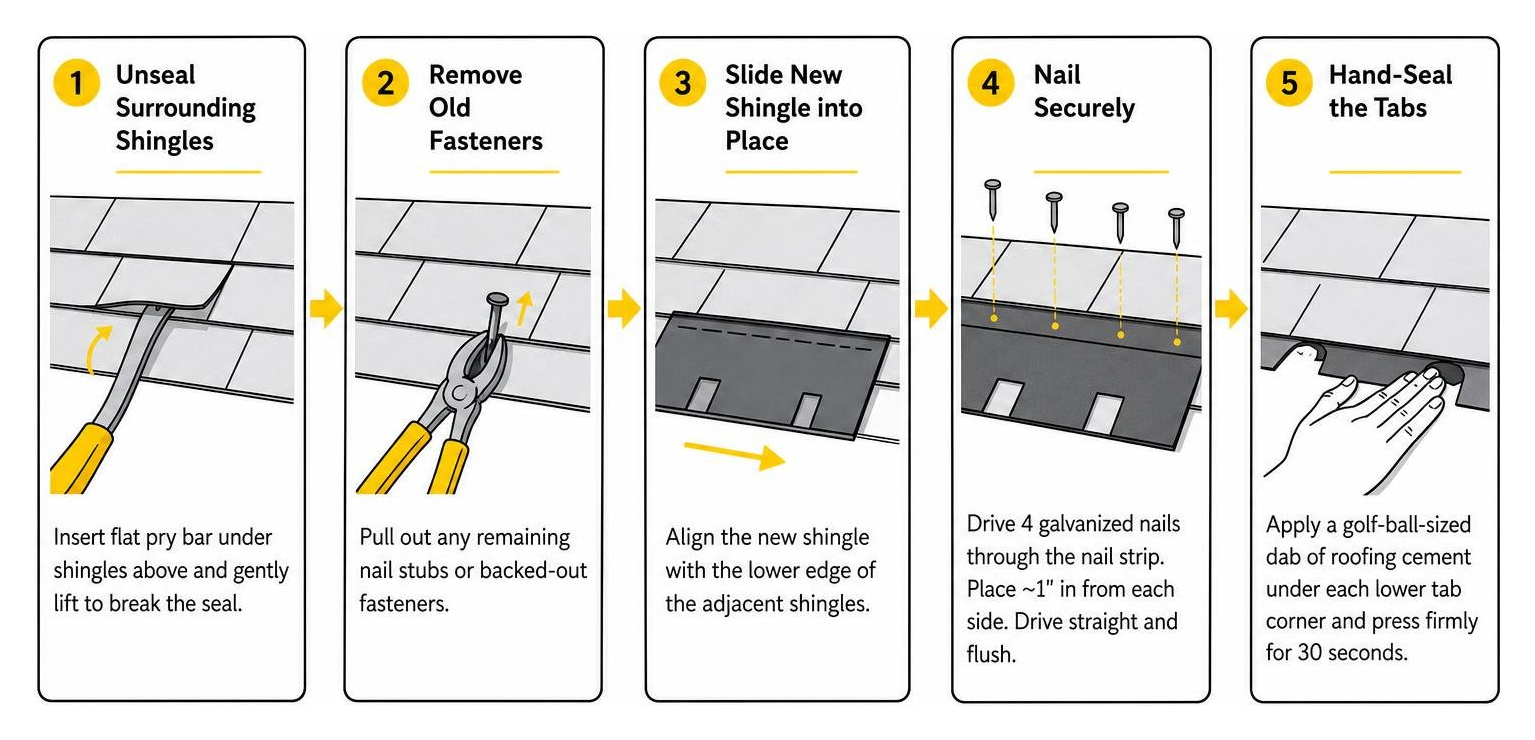
- Unseal Surrounding Shingles: Gently insert your flat pry bar under the overlapping shingles directly above the missing shingle to break the factory sealant strip.
- Remove Old Fasteners: Locate and pull out any remaining nail stubs or backed-out fasteners in the vacant space. Never hammer old nails flat, as they will punch through your new shingle from underneath.
- Slide the New Shingle into Place: Align the new shingle with the lower edge of the adjacent shingles.
- Nail Securely: Drive 4 galvanized roofing nails through the designated nail strip — placing nails roughly 1 inch in from each side edge. Ensure nails are driven straight and flush, not over-driven or slanted.
- Hand-Seal the Tabs: Apply a golf-ball-sized dab of roofing cement under each lower tab corner of the overlapping shingles above and press firmly for 30 seconds. Skipping this re-sealing step is the main reason DIY repairs blow off in the next storm!
Sealing Cracked Shingles and Re-Adhering Lifted Tabs
Cold freeze-thaw cycles and falling branches can cause individual shingles to split or lift.
For cracked shingles, gently lift the cracked section with your pry bar and spread a 1/8-inch layer of fibered plastic roofing cement underneath the break. Press the shingle flat. Next, apply a thin coat of cement over the top crack and firmly press loose granules (swept from your gutters) into the wet cement. This shields the cement from damaging sunlight.
For lifted or curled shingle tabs, warm brittle shingles slightly with a heat gun to make them pliable. Apply golf-ball-sized dabs of roofing cement underneath the bottom edge corners and press down firmly.
Patching Small Punctures and Resealing Flashing
Small punctures under 2 inches (from storm debris or dropped tools) can be sealed using a layered patching method. Clean away loose granules, apply roofing cement over the hole, press a piece of woven polyester fabric mesh over the cement (ensuring at least a 2-inch overlap on all sides), and cover the mesh with a second coat of sealant.
When dealing with exposed flashing seams or pipe boots, scrape away dry, cracked caulk with a wire brush. Do not apply new caulk over old failed caulk. Clean the area with mineral spirits and apply a continuous bead of high-performance sealant. High-quality products like DAP Roof Waterproof Asphalt Sealant TDS conform to ASTM D4586 standards, operate across temperatures from -40°F to 180°F, and provide superior adhesion on wet or dry substrates.
Repair vs. Replacement: Cost Analysis and Decision Rules
When roof damage occurs, deciding whether to patch or completely replace your roof comes down to mathematics, age, and systemic damage.
| Repair Option | Typical Cost Range | Best Suited For | Expected Lifespan |
|---|---|---|---|
| DIY Spot Repair | $20 – $150 | 1–5 damaged/missing shingles, isolated leaks | 1 – 3 years (temporary) |
| Professional Roof Repair | $150 – $1,500 | Flashing issues, pipe boot fixes, localized storm damage | 3 – 10 years |
| Full Roof Replacement | $8,000 – $20,000+ | Widespread damage, roofs >20 yrs, structural rot | 15 – 30 years |
To explore overall budgeting, take a look at our breakdown on The Real Cost Of Asphalt Shingle Roof Replacement as well as our guide on How Much To Replace Your Damaged Shingles.
Evaluating the 30% Cost Threshold and Damage Extent
Professional roofers follow standard guidelines when recommending repair versus full replacement:
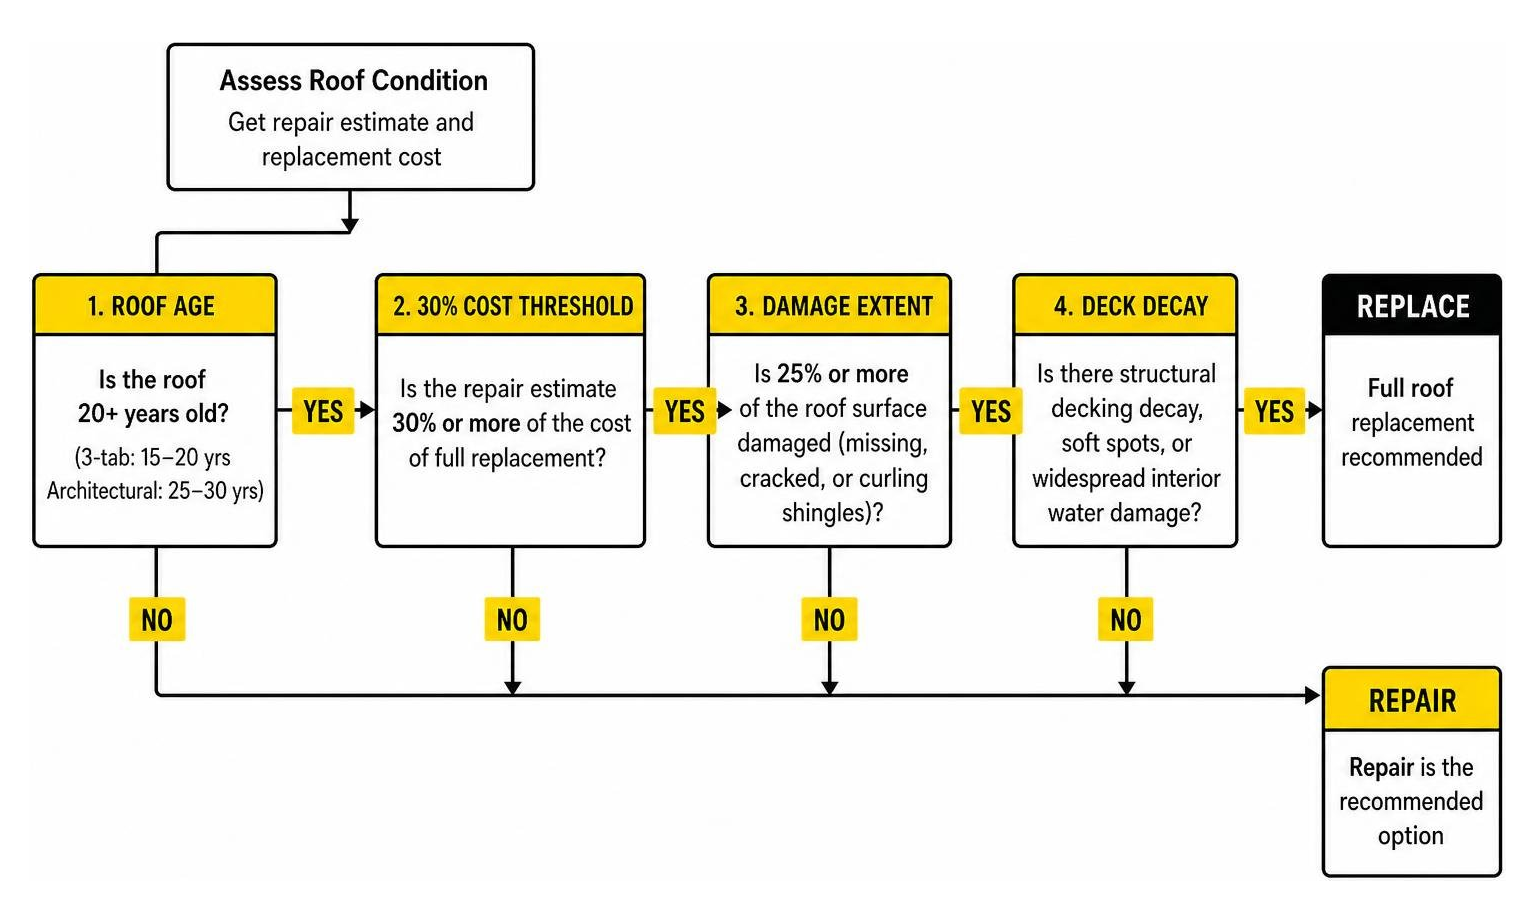
- The 30% Cost Rule: If total asphalt roof repairs cost less than 30% of a full replacement, repair is generally the most sensible financial decision. If repair quotes exceed 30% to 40% of full replacement cost, investing in a new roof is more economical in the long run.
- Percentage of Damage: If more than 25% to 30% of your total roof surface has missing, cracked, or curling shingles, the system has reached the end of its useful lifespan.
- Roof Age: 3-tab shingles typically last 15 to 20 years, while modern architectural shingles last 25 to 30 years. Sinking money into repairs on a 22-year-old 3-tab roof is rarely worthwhile.
- Structural Decking Decay: Soft, sagging deck boards or widespread interior water damage mandate a complete tear-off to replace rotting plywood underneath.
If your roof meets the replacement threshold, scheduling a professional Roof Replacement ensures your home remains protected against severe winter storms and rain.
Preventive Maintenance Practices to Prevent Roof Damage
Routine upkeep extends the life of your asphalt roof and prevents expensive repairs.
- Clean Gutters Biannually: Clogged gutters cause water to back up under eave shingles, rotting fascia boards and underlayment.
- Trim Overhanging Trees: Keep branches clipped back at least 6 to 10 feet from your roofline to prevent shade-induced moss growth and limb impacts.
- Schedule Biannual Inspections: Inspect your roof every spring and fall to catch loose flashing and missing sealant before water gets into your home.
- Maintain Attic Ventilation: Proper airflow keeps attic temperatures balanced, preventing summer heat from baking shingles from below and stopping winter ice dams from forming.
For a deeper dive into seasonal care, read our complete guide on Roofing Maintenance Tips.
Critical Limitations and Mistakes in Asphalt Roof Repairs
Making hasty repairs with the wrong materials often creates far bigger problems than the initial leak.
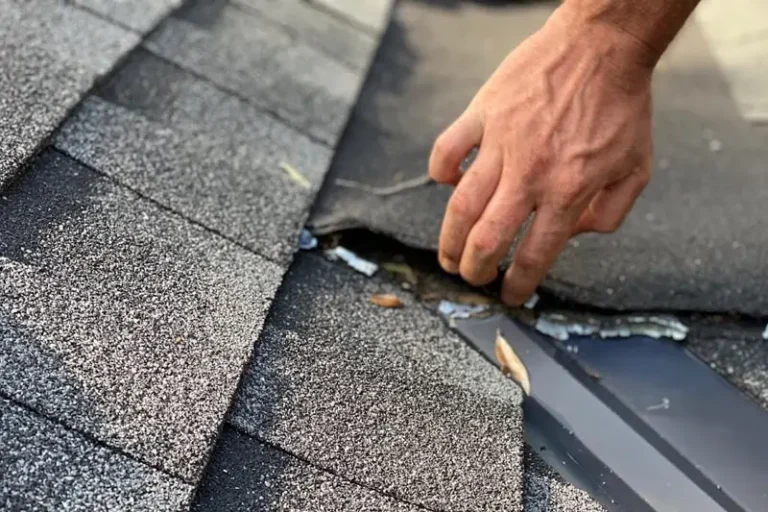
Emergency Patch Kits and Roofing Cement Limitations
Temporary repair kits and emergency roof mastics are helpful in an emergency, but they are not permanent solutions.
- UV Degradation: Cold-applied roofing cement exposed directly to sunlight without embedded granules or protective coverings will dry out, shrink, and crack within 1 to 2 seasons.
- Silicone Caulk Prohibition: Never use silicone caulk on asphalt shingles. Silicone fails to form a lasting chemical bond with petroleum-based asphalt and leaves a residue that prevents future adhesives or paints from sticking.
- Layering Over Old Caulk: Applying new sealant over dirty, cracked caulk guarantees failure within a single season. Always strip damaged sealant back to bare metal or shingle granules.
Temporary fixes should be treated as short-term water-control measures, not complete roof repairs. For manufacturer-backed guidance on repairability, consult the industry technical standards in the ARMA Technical Bulletin on Asphalt Repairability.
Color Matching Replacement Shingles and Avoiding Unapproved Coatings
Getting repair shingles to match an existing roof requires careful planning:
- Save Leftover Shingles: Store 1 or 2 leftover bundles in your garage or basement after a new roof installation.
- Match Color Names: If you don’t have spare shingles, identify the manufacturer (e.g., Owens Corning, GAF, CertainTeed) and exact color blend name.
- Expect Weathering Differences: New shingles will look slightly darker initially because your existing roof has experienced sun fading and granule loss. Over 6 to 12 months, weathering will blend the shades together.
Warning on Roof Rejuvenators and Post-Installation Coatings: Beware of liquid “spray-on rejuvenators” or non-approved asphalt coatings that promise to restore old shingles. The Asphalt Roofing Manufacturers Association (ARMA) warns that unverified chemical treatments can dissolve shingle asphalt, invalidate manufacturer warranties, and create severe fire hazards. Always consult your original shingle manufacturer before applying any spray treatments.
Frequently Asked Questions About Asphalt Roof Repairs
How much do DIY and professional asphalt roof repairs cost?
DIY materials cost between $20 and $150 for minor shingle replacements and caulking jobs. Professional asphalt roof repair ranges from $150 to $1,500 depending on roof pitch, accessibility, and damage extent (such as flashing rebuilds or pipe boot replacements).
What are the best methods for temporary vs permanent asphalt roof repairs?
For active leaks during heavy rain, placing a secured heavy-duty tarp over the roof slope is the safest temporary fix. If water is entering the home now or storm damage has exposed the deck, request emergency roofing service instead of climbing onto a wet roof. Permanent repairs require replacing damaged shingles, fixing step flashing, and driving new fasteners into structural framing.
When should an asphalt shingle roof be replaced instead of repaired?
Replace your roof if it is over 20 years old, if more than 25% to 30% of the shingles are damaged, if the roof deck feels soft underfoot, or if repair quotes exceed 30% to 40% of a full roof replacement cost.
Conclusion
Taking care of asphalt roof repairs quickly keeps small leaks from turning into costly structural headaches. By knowing how to trace leaks, replace broken shingles, and spot flashing problems, you can handle minor repairs safely and confidently.
When roof damage covers large areas, involves rotten decking, or requires climbing steep slopes, calling a trusted local professional is the smartest move. At Mid Ohio Roofing, we provide reliable inspections, repair work, and full replacements across Mount Perry, Columbus, Newark, Mount Vernon, and surrounding central Ohio communities.
Need help with your roof? Contact Mid Ohio Roofing today or explore our full range of Asphalt Shingle Roofs services to keep your home safe and dry all year round.